Do you want to display post meta data in your WordPress blog posts?
Meta data includes important information about your posts, such as the publication date, the author’s name, and the tags. At times, you may want to display extra details in this section.
In this article, we will show you how to display post meta data in WordPress posts easily.

Why Edit and Display Blog Post Meta Data on Your WordPress Site?
Blog post meta data is information about a post that’s not part of the actual content. It includes things like the publication date, the name of the author, categories and tags in WordPress, and more.
This meta data can appear in lots of different locations, depending on your WordPress theme.
Wherever it appears, WordPress meta data can help visitors learn more about your content. It can also help them discover other interesting posts. For example, they may look for more blogs written by the same author.
In this way, post meta data can improve the user experience and may even increase pageviews. Just be careful about displaying too much post meta data, as it can make your site look messy and confusing.
By default, WordPress will display some post meta data already, like the blog post’s publication date, author name, and category. But at times, you may want to add extra information.
With that being said, let’s see how you can display post meta data in WordPress themes. Simply use the quick links below to jump straight to the method you want to use:
Method 1: Using the WordPress Theme Customizer (Classic Themes)
Some classic WordPress themes allow you to customize the post meta data without writing any code.
To check whether this is the case for your theme, just go to Appearance » Customize, which opens the WordPress theme customizer.
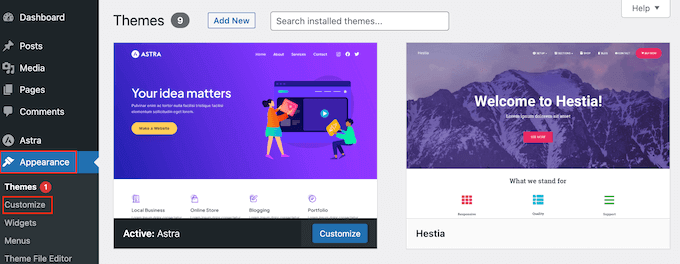
You can now look for any settings that allow you to customize your blog pages. These will typically be labeled ‘blog,’ ‘blog settings,’ ‘posts’ or similar.
For example, if you are using the Astra WordPress theme, then you can simply select ‘Blog’ from the left-hand menu.
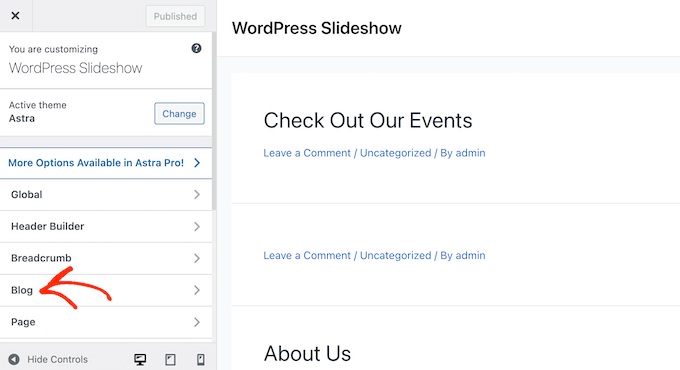
After that, click on ‘Blog / Archive.’
Simply scroll to the ‘Meta’ section to see all the different data that you can add or remove.
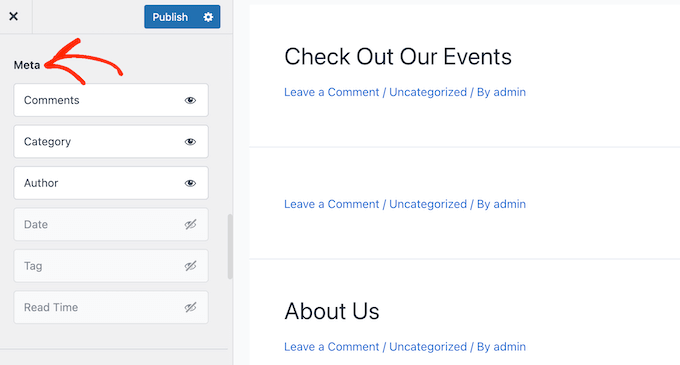
To add meta data to your site, just click on its ‘show’ icon, which looks like an eye.
To remove a piece of meta data, click on the icon again.
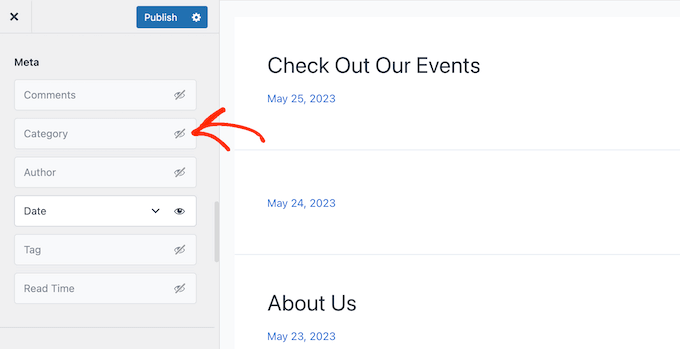
You can also change the order that WordPress shows this meta data to visitors using drag and drop.
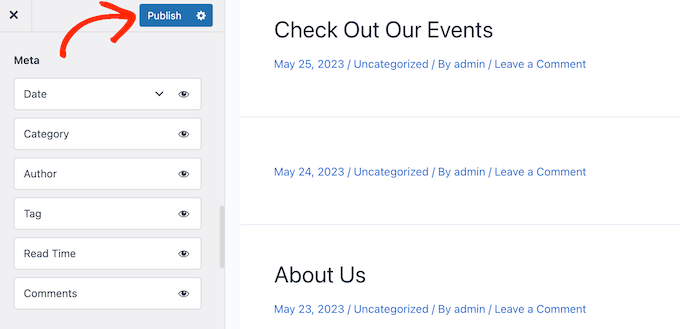
As you make changes in the theme customizer, the live preview will update automatically, so you can try different settings to see what looks the best for your WordPress website.
When you are happy with how the meta data looks, don’t forget to click on ‘Publish’ to make your changes live.
Even if you don’t see any post meta data settings in the WordPress customizer, there may still be a way to add this information without writing code.
With that in mind, we recommend looking at the theme’s documentation. You can also reach out to the theme’s developer for help.
For lots of useful tips, please see our guide on how to properly ask for WordPress support and get it.
Method 2: Using the Full-Site Editor (Block Themes)
If you are using a block-based theme like Hestia Pro, then you can display meta data for posts on your WordPress website using the Post Meta block.
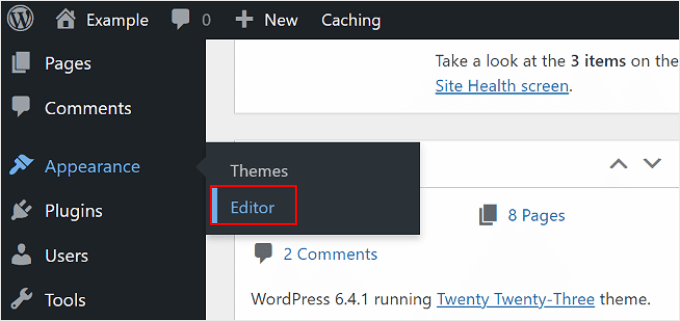
To get started, just go to Appearance » Editor in the WordPress dashboard.
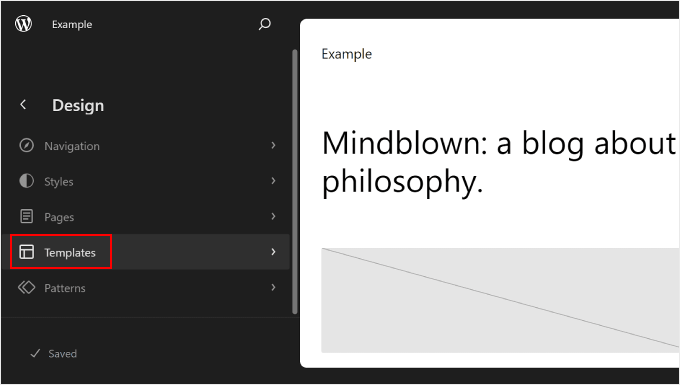
By default, the full-site editor will show your theme’s home template.
To add the meta data to your WordPress blog posts, go ahead and click on ‘Templates’ in the left-hand menu.
The editor will now show a list of all the templates that make up your WordPress theme.
Simply click on the Single template, which controls the layout of your blog posts.
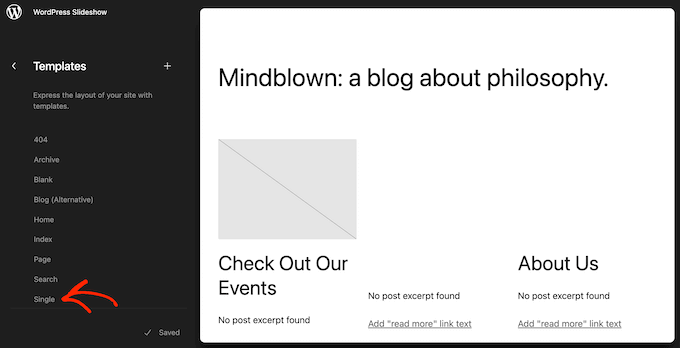
WordPress will now show a preview of the Single page template.
To edit this template, go ahead and click on the small pencil icon.
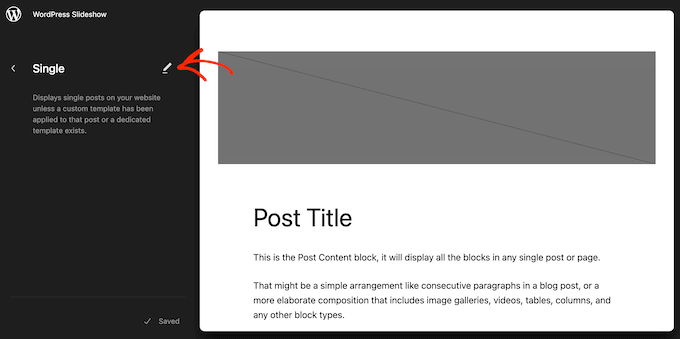
Typically, the Single post template should already have a Post Meta block in it, which you can then edit to your liking.
But if not, then you need to click on the blue ‘+’ icon in the top left corner. In the search bar that appears, type in ‘Post Meta.’
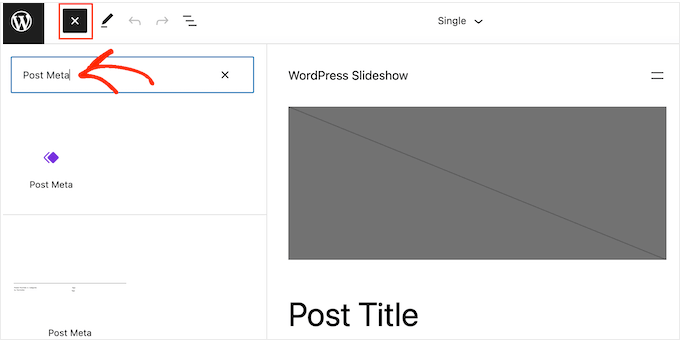
When the right block appears, drag and drop it onto your blog layout.
By default, this block will show the post’s categories, author name, and tags.
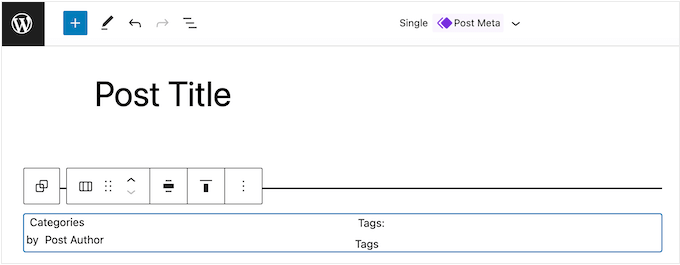
You may want to edit this meta data. For example, you might delete the tags or change the static text that WordPress shows before the meta data.
The following image shows an example of how the default Post Meta block will look on your WordPress blog.

To change this block, simply click to select it in the full site editor. You can then click on any block within the Post Meta block and make your changes.
Just pay careful attention to whether you are editing the static text that WordPress shows in front of the meta data or the dynamic text that WordPress will replace with real values.
For example, in the following image, we have added some static text to the Post Author section.

However, we haven’t changed the ‘Post Author’ dynamic text.
In the following image, you can see how this will look on your WordPress blog.

You may also want to add more meta data to the Post Meta block.
For example, the full site editor has blocks, such as Post Date and Post Author Biography, that you can easily add to the Post Meta block using drag and drop. There are many options to choose from, so you can take your time to explore them.
Simply click on the blue ‘+’ button and then find the block that you want to use. You can then drag and drop it onto the Post Meta block.
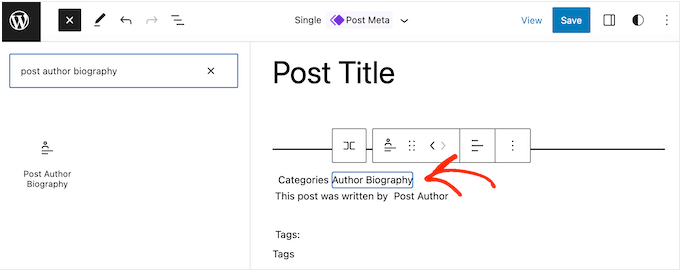
If you add more blocks to the Post Meta block, then you may need to change its layout.
To do this, simply click on the Post Meta block and then select the ‘Block’ tab.
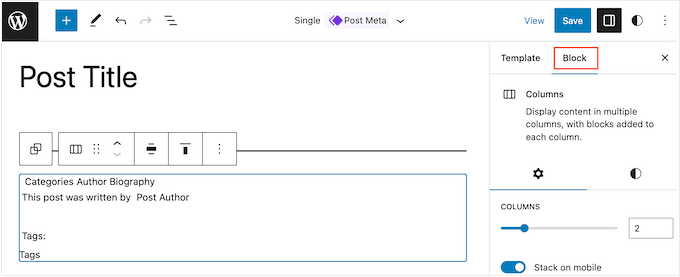
You can now use these settings to arrange the content in a nice layout. For example, you might change the number of columns or add margins and padding.
When you are happy with how the Single template looks, click on the ‘Save’ button.
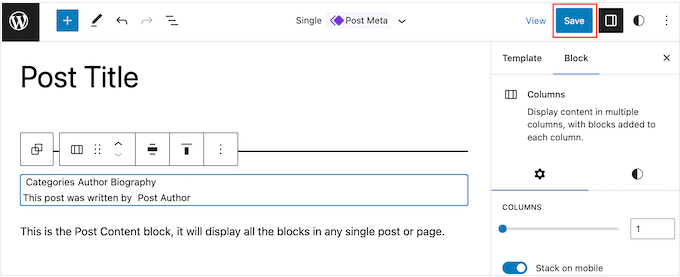
Now, if you visit your website, then you will see the post meta data in action.
After that, you may want to add post meta data to other areas of your website, such as your custom archive page.
To do this, simply open the full site editor by following the same process described above.
You can then select ‘Templates’ from the left-hand menu and choose the template you want to edit.
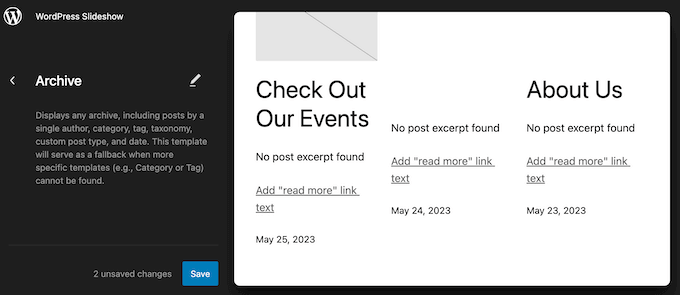
After that, you can add post meta data following the same process described above.
Pro Tip: Want to take your single post pages to the next level? Follow this step-by-step guide to learn how to create a custom single post template in WordPress.
Method 3: Creating a Custom WordPress Theme (Fully Customizable)
Another option is to create a custom WordPress theme. This is a more advanced method, and it’s recommended if you want to use an entirely different theme for your site.
That said, it will give you complete control over where the post meta data appears on your website.
In the past, you would need to follow complicated WordPress tutorials and write code to build a custom WordPress theme. However, it’s now possible to create your own themes without writing a single line of code using SeedProd.
SeedProd is the best drag-and-drop WordPress page builder and also comes with a theme builder. This allows you to design your own themes using a simple drag and drop editor.
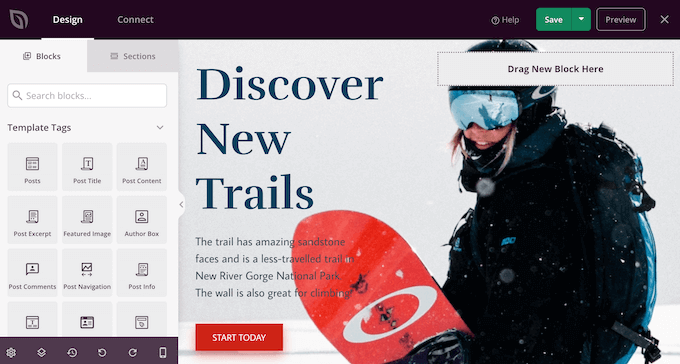
For step-by-step instructions, please see our guide on how to create a custom WordPress theme (without any code).
After that, you can add post meta data to any part of your WordPress website. Simply find the ‘Post Info’ block in SeedProd’s left-hand menu.
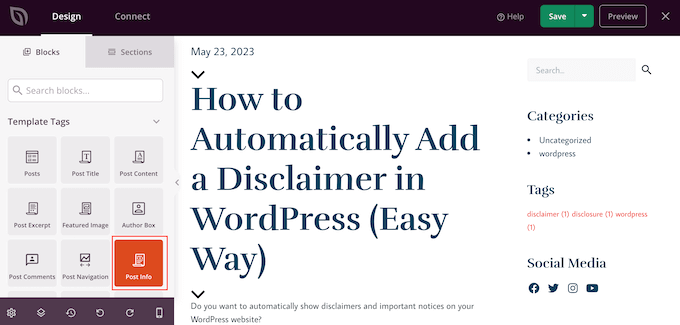
Now, drag and drop the block onto your page layout.
After that, click to select the Post Info block. By default, this block shows the author, date, time, and comments meta data.
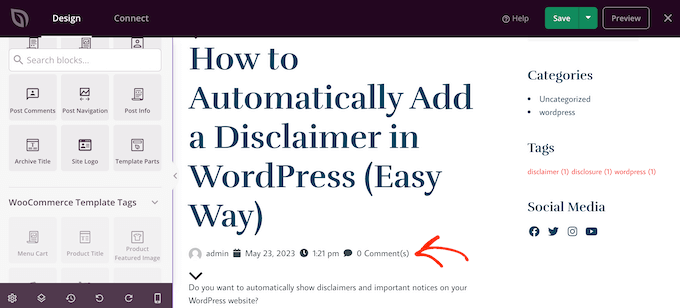
However, you can also show the modified date, modified terms, and terms meta data.
To add more information to the block, simply go ahead and click on ‘Add Item.’
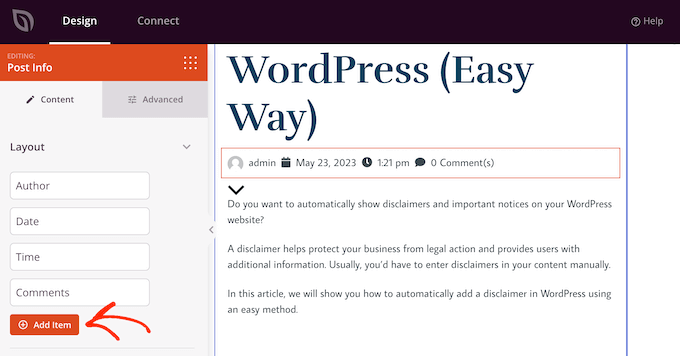
This adds a new placeholder item.
Now, go ahead and click on the item to see all its settings.
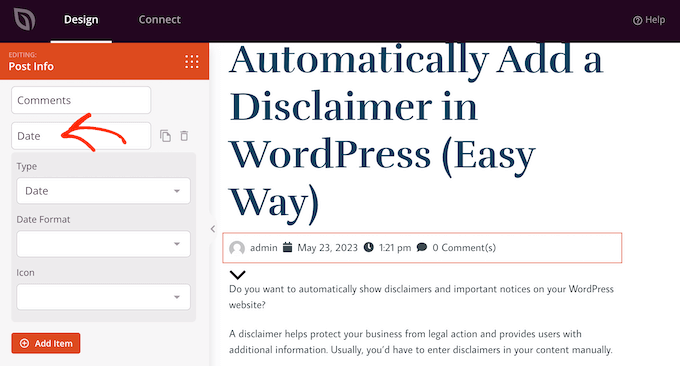
Now, open the ‘Type’ dropdown and choose the type of meta data you want to display.
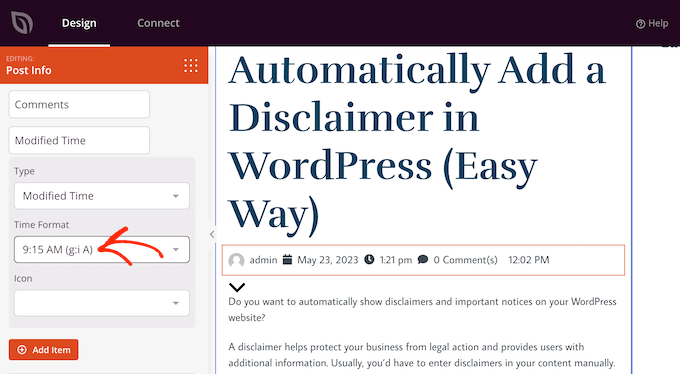
Depending on the option you choose, you will get access to some additional settings. For example, if you selected ‘Modified Time’, then you can choose the time format.
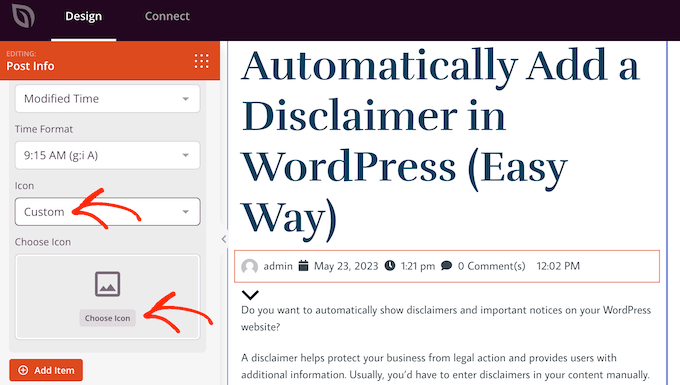
You can also change the icon that SeedProd uses for the meta data item. Simply open the ‘Icon’ dropdown and then choose ‘Custom.’
You can then go ahead and click on ‘Choose Icon.’
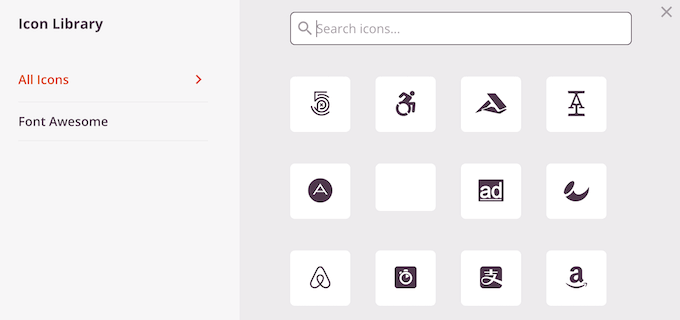
This brings up the icon library with hundreds of icons to choose from. You can use the search bar to look for a specific icon or browse through the entire list.
When you find an image you want to use, simply hover over it and then click the ‘Plus’ button to add it to your page.
Do you want to remove a meta data item instead?
Then simply hover your mouse over it and then click on the trash can icon when it appears.
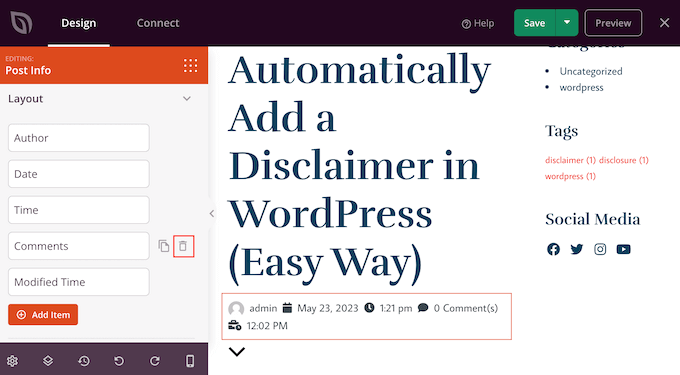
Finally, you can change the order of the meta data items using drag and drop.
When you are happy with how the Post Info box is set up, you may want to change how it looks by selecting the ‘Advanced’ tab.
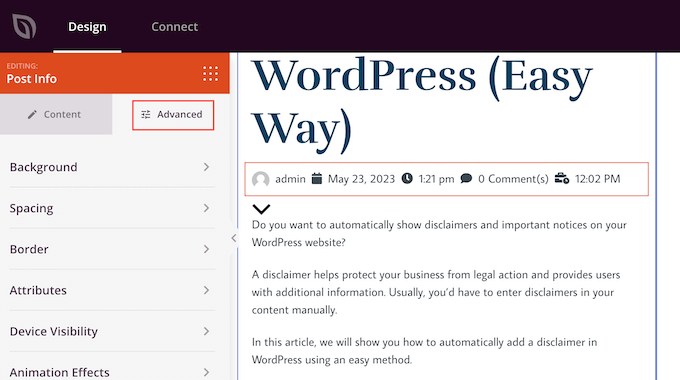
Here, you can change the spacing, add a border, and even add CSS animation effects.
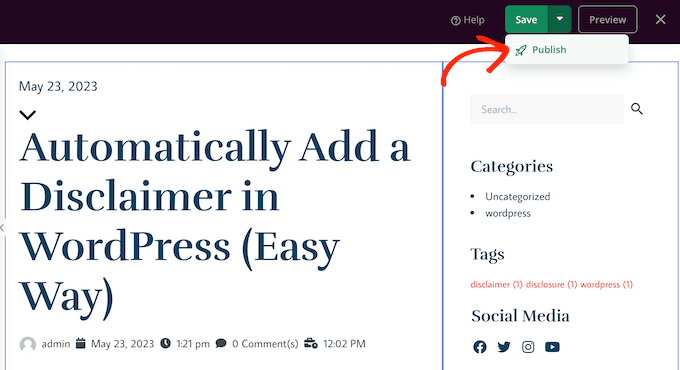
When you are happy with how the page looks, just click the ‘Save’ button and then choose ‘Publish’ to make it live.
Expert Tip: Want to have a fully custom theme that’s tailored to your WordPress website? Check out our WordPress Website Design services and let our experts build a beautiful theme made to your exact needs.
Method 4: Using Advanced Custom Fields (Fully Customizable)
Perhaps you may find creating a custom theme just to display additional ost meta to be an overkill. In that case, you can use custom fields or custom meta boxes instead.
Both options let you add your own fields in the WordPress block editor, which you can then use to insert various types of meta data.
For more information, just see the following guides:
- WordPress Custom Fields 101: Tips, Tricks, and Hacks
- How to Add Custom Meta Boxes in WordPress Posts and Post Types
Method 5: Adding Code to Your WordPress Theme Files (Advanced)
Finally, you can add blog post meta in WordPress using custom code. This method is recommended if the post meta data options provided by the WordPress theme customizer, full-site editor, and SeedProd don’t meet your needs.
If you are a beginner, then using code may seem intimidating as you can potentially break your website. That’s why we recommend using WPCode, the easiest and safest plugin to insert custom code snippets in your site.

With WPCode, you can add code to WordPress without directly interacting with the software’s core files. This way, you won’t cause any errors on your WordPress site.
We actually already have some articles with custom code snippets that you can use as post meta data. You can get started with the following guides:
- How to Display the Last Updated Date of Your Posts in WordPress
- How to Add Affiliate Disclosure for Each Blog Post Automatically
- How to Remove Author Name from WordPress Posts
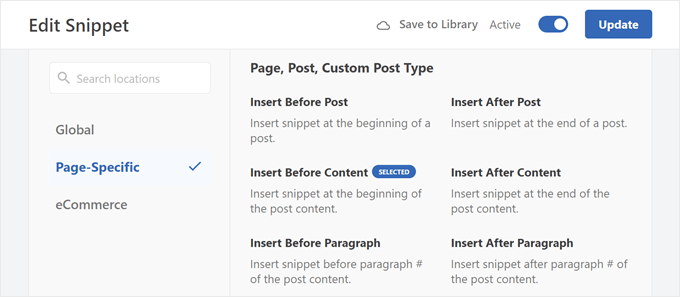
One thing to note is that you will need to choose the right location for the code to run so that it shows up on all of your blog posts.
For post meta data, this can be Insert Before Post, Insert After Post, Insert Before Content, or Insert After Content.
We hope this article helped you learn how to display blog post meta data in your WordPress themes. You may also want to see our guide on how to add meta descriptions and keywords in WordPress and our expert picks of must-have WordPress plugins.
If you liked this article, then please subscribe to our YouTube Channel for WordPress video tutorials. You can also find us on Twitter and Facebook.


Syed Balkhi says
Hey WPBeginner readers,
Did you know you can win exciting prizes by commenting on WPBeginner?
Every month, our top blog commenters will win HUGE rewards, including premium WordPress plugin licenses and cash prizes.
You can get more details about the contest from here.
Start sharing your thoughts below to stand a chance to win!
Moinuddin Waheed says
I have seen many blog posts showing the read time of the article and wondered if how
can it be embedded for each posts.
It seems that like all other fields like date, number of views and other stuff, it can also be eaily added for each post.
For a blog that has multiple contributors, it is good practice to add author’s bio as it increases the chances of getting other articles by the same author to be clicked.
I don’t know how to get read time of each article, It would be great if you can help me with this?
I think having meta deta also helps in seo and ranking factors to an extent.
WPBeginner Comments says
For adding an estimated read time, check out this guide here: https://www.wpbeginner.com/plugins/how-to-display-estimated-post-reading-time-in-your-wordpress-posts/
Jiří Vaněk says
I left the metadata basic, but according to your instructions in different article, I added the date of the last modification of the posts using a snippet. In addition, I modified it so that it is displayed only for articles and not for pages. I found it important to add the latest revision of the article, because if a reader sees an article that was published, for example, two years ago, he may consider it outdated and the content irrelevant. That’s why I added this metadata to make it clear at first glance that the article is being added to and edited over time to be valid for its time. I find this information really important.
Ralph says
As an autor of personal blog i ditched all of that info. Everybody knows only 1 person post on that website and i think this just waste the space on screen and first glance is very important for stay or nay decision. I only left the post original date (or when edited) as i often write about specific stuff and want readers to know if it is up to date or not.
WPBeginner Support says
That is certainly an option for that type of site but there are many different types of sites out there
Admin
Ahmed Omar says
I am using the first metod, it is easy and convenient for me
Thank you for the detailed post
WPBeginner Support says
You’re welcome, glad our guide was helpful!
Admin
Serah says
I’m using code snippets and none of it work. I get the following error message “syntax error, unexpected ‘<', expecting end of file"
WPBeginner Support says
You may want to try adding above the code snippet you are trying to use the closing tag:
?>
Admin
zunairah says
Hey, great article. I want to display only one category on my blog. Let’s say if I have a post that comes under three categories, I want to display only one category out of three as metadata on a single post. How can I achieve it?
WPBeginner Support says
In those cases, it would normally be better to restructure your categories so the post would only be in one and use tags for organization
Admin
Thom says
Thanks a lot for this article! I have one question. Is it possible to hide Tags: and This post was filed under: in case no tags or categories are set?
WPBeginner Support says
It would depend on how your specific theme has added it and you would normally add a conditional statement. If you check with the support for your theme they may be able to assist.
Admin
Arif Wali says
Hello,
Wpbeginners helped me alot during my whole career. Thank You for all. I have a question that is there any role of published date and authors name in SEO? can it effect ranking ? I have a php website and I have published many posts but it doesn’t contain any author name or date. should I add these to my site ?
WPBeginner Support says
The published date can sometimes be a ranking factor but your author’s name shouldn’t be a ranking factor. For SEO you would want to take a look at our article here: https://www.wpbeginner.com/wordpress-seo/
Admin
Clayton says
Great article! Thank you
WPBeginner Support says
You’re welcome
Admin
Jen says
Thanks for the info! So I’m trying to add a date to my posts. I saw your code but where is that added?
Thank you!
WPBeginner Support says
It would depend on where you want to have the information displayed for where to add the code. If you reach out to the support for your current theme they should be able to point you to the right direction
Admin
simpson says
Hello, i have news aggregator site how to add on homepage after every post source name and time when is published post (example google | before 45 minutes
Liudmyla Shapovalova says
Hello, I have added an author name using the code provided in the article, but the link goes to the home page and not to the all articles written by this author. Please advise, thank you in advance, Liudmyla